西西里防御- 龙式体系
Memo and Resources
Resrouces
- https://en.wikipedia.org/wiki/Sicilian_Defence
Highlights
- T.B.D
Bowang Memo
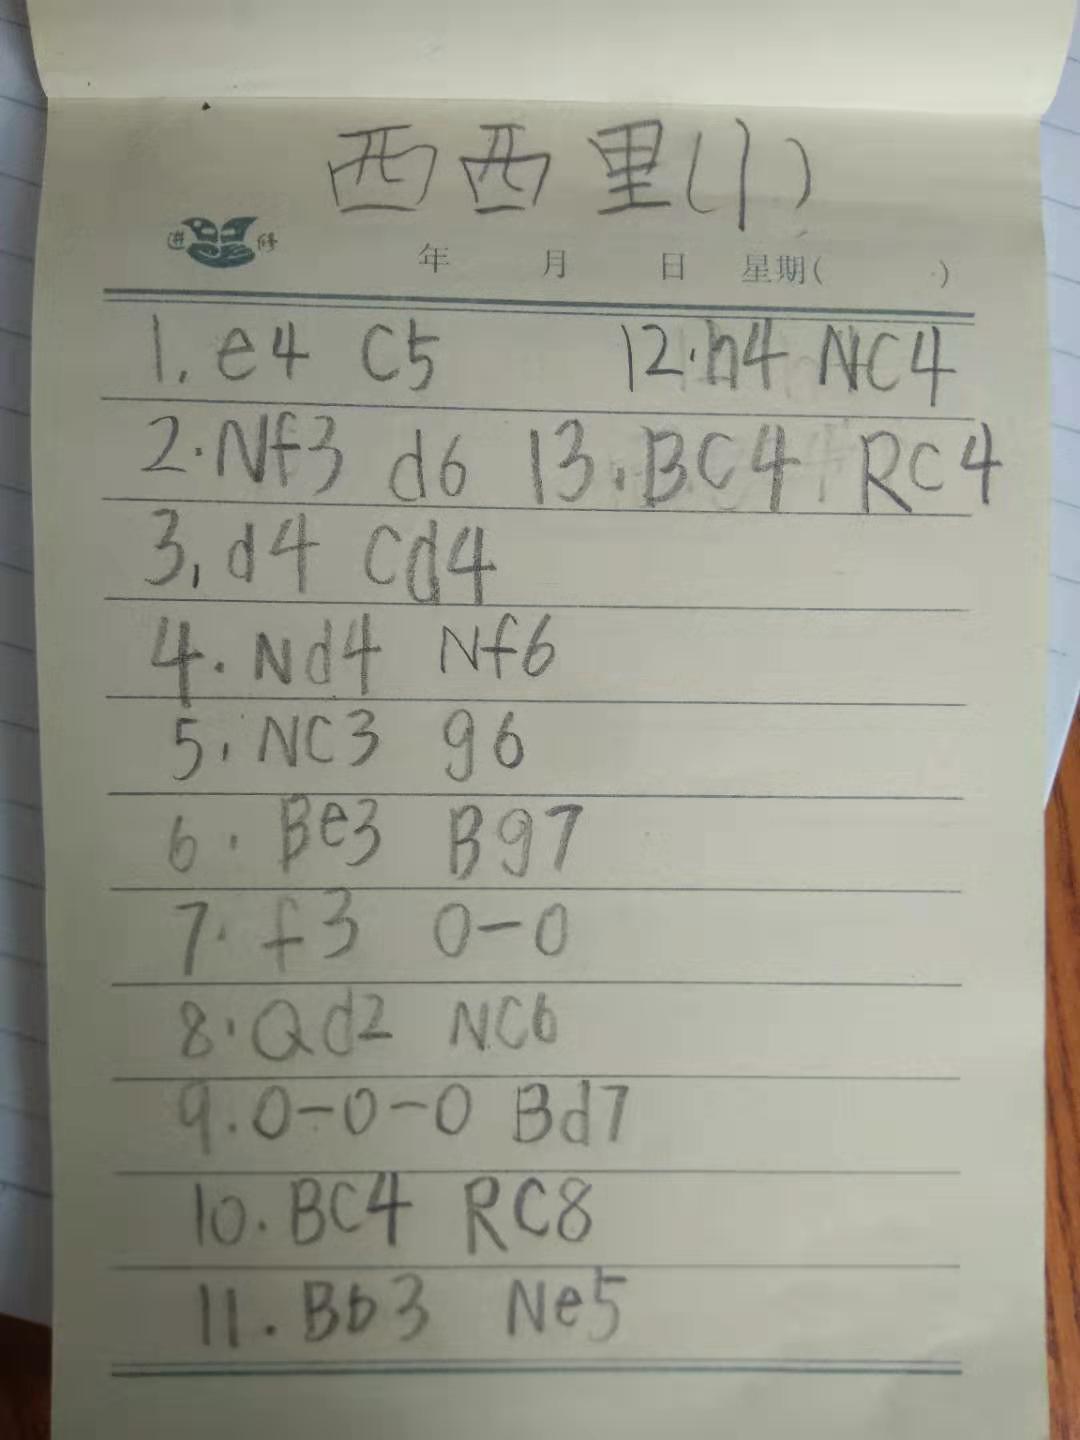
Step 1: e4, c5

White Comment:

Black Comment:
Step 2: Nf3, d6

White Comment:

Black Comment:
Step 3: d4, cxd4

White Comment:

Black Comment: 这一组棋,白棋挺兵之后,黑棋必须选择兑换,否则失去西西里开局意义,对黑方不利。
Step 4: Nxd4, Nf6

White Comment:

Black Comment:
Step 5: Nc3, g6

White Comment:

Black Comment: 根据小象视频,现在黑棋有多种选择,而挺兵g6就形成了西西里开局的龙式防御。
Step 6: Be3, Bg7

White Comment:

Black Comment: 黑棋不能直接上马g4吃白象。因为如果另一个白象a5将军, 黑棋必须垫象受牵制,马将被后吃掉。所以黑方Bg7这步棋,除了形成堡垒对王加强防御之外,也为黑棋接下来可以上马吃象做准备(因为现在白棋再将军,可以躲王,而象不用受到牵制)。
Step 7: f3, O-O

White Comment: 接上面的注释,为了防止黑棋跳马吃象,白棋这组棋中,必须挺兵f3, 控制住g4点。

Black Comment: 注: 小象视频中是,先上马后易位。
Step 8: Qd2, Nc6

White Comment: 上后的目的一个是长易位,二个是和象一起威胁h6点,将来通过h线兑换象和弃兵,打通h线,进行进攻。另注: 丹宁老师步骤是后,易位和象,而小象视频中这几步是象,后和易位,不知道顺序是否有意义。还是泽泽棋谱记错了。需要和老师确认。

Black Comment: 接下来几步,黑棋跳马上象出车,都是要调动后翼力量。黑棋将来的目的是控制c线。
Step 9: O-O-O, Bd7

White Comment:

Black Comment:
Step 10: Bc4, Rc8

White Comment:

Black Comment:
Step 11: Bb3, Ne5

White Comment:

Black Comment:
Step 12: h4, Nc4

White Comment:

Black Comment:
Step 13: Bxc4, Rxc4 (冬训棋谱至此结束, 剩下的棋谱是从小象视频整理过来的)

White Comment:

Black Comment: 丹宁老师棋谱结束。后续为我根据小象视频总结的一些下法。
Step 14: Nde2, Qa5

White Comment:

Black Comment: 白棋不能直接h5, 这一步是做准备,防止黑马e4。
Step 15: h5, Nxh5

White Comment:

Black Comment:
Step 16: g4, Nf6

White Comment:

Black Comment:
Step 17: Bh6, Bxh6

White Comment:

Black Comment:
Step 18: Qxh6, Rfc8

White Comment:

Black Comment:
# 黑棋第19步的一个错误应对方法的举例
Step 19: Rd3, R4c5??

White Comment: 这步是防止黑棋双车破坏双马进攻白棋阵地,先防守一步。下一步挺不g5赶马。

Black Comment: 小象视频讲解,这步是败招。
Step 20: g5, Rxg5

White Comment:

Black Comment:
Step 21: Rd5, Rxd5

White Comment:

Black Comment:
Step 22: Nxd5, -

White Comment: